
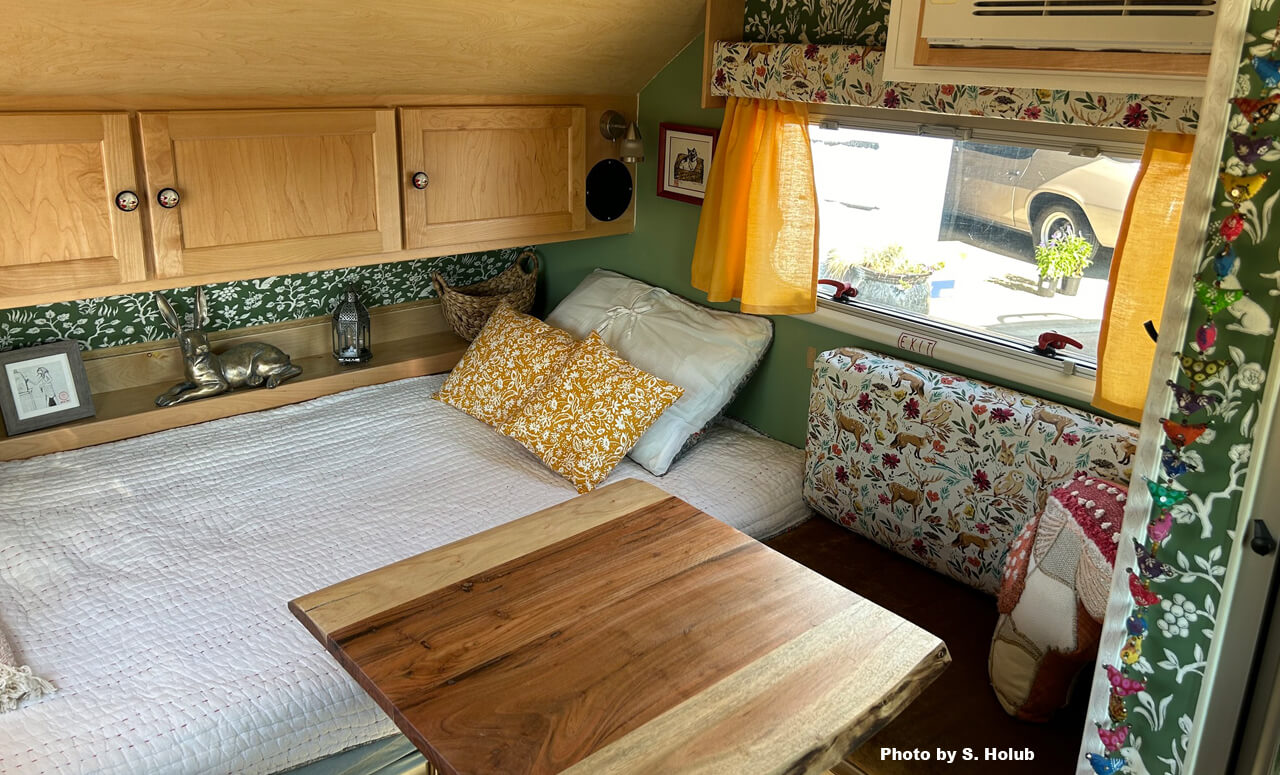
Over the last couple months, I’ve taken the tiny teardrop trailer out a few times, but I’ve also spent a lot of time making it my own by decorating it.
I’ve always had a love of interior design and I like to think I have an eye for it. My own style is quite eclectic. I have always had fun switching up the decor in the house, so when I bought the trailer, I knew I was going to do a major overhaul.
“The details are not the details. They make the design.” –Charles Eames
The original interior of the trailer was not horrible, but it was boring. Since I don’t plan on getting rid of the trailer anytime soon, I wasn’t worried about making some big changes to the walls and floor.
After researching a bit online on dealing with things like painting and wallpaper in a trailer, I started to formulate some ideas.
It helped that I’d already named the little trailer, The Gnome Home. The vibe I really wanted to go for with the decor was a kind of magical forest with natural elements, animals, flora and fauna. At the same time, I also had a lot of ideas on little storage upgrades and additions to make life while I’m in the trailer easier.
“Be faithful to your own taste, because nothing you really like is ever out of style.” –Billy Baldwin
One of the bigger things I did was to swap out the original, large, clunky, folding table that came with it, with a live-edge, “lagoon” table (a table supported with a single leg that is typically mounted to the side of a wall or something and swings in either direction). I managed to find a very nice table top at Wayfair and then the lagoon table leg on Amazon. I installed that before my second trip out with the trailer.
Here’s a before and after:
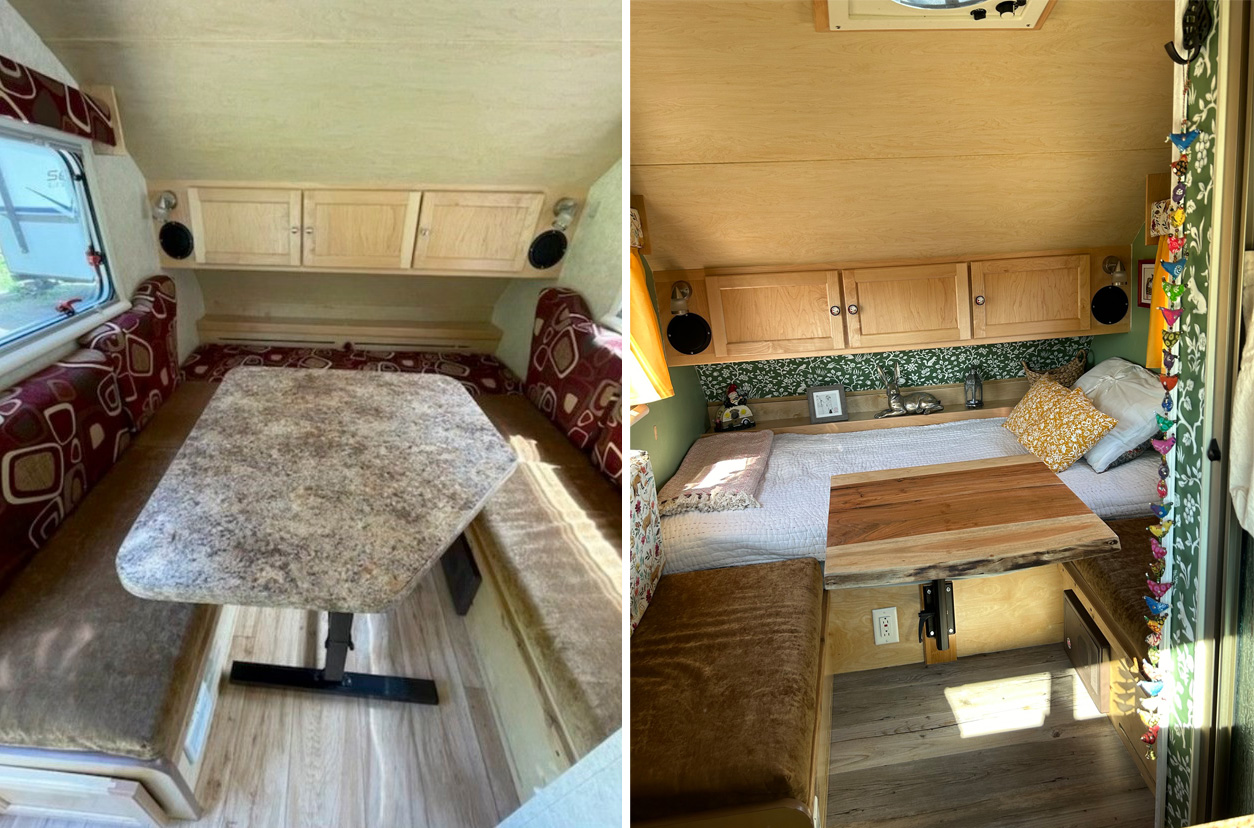
When I realized the original flooring was a very thin, single piece of vinyl, I decided to cut it out and got some nicer, thicker vinyl planks that look like wood. They were rather easy to install and a nice visual and functional upgrade.
I tackled painting the walls next. I chose a fresh, light green color (primer and paint in a one-coat product) and went right over the wallpaper that came with the trailer.
Next up was adding some new wallpaper as an accent in certain areas. I chose a really cute design with some floral, leaf patterns along with animals like hares and foxes. The paper was a darker green than the paint. It was also traditional wallpaper, not the peel-and-stick kind and in my opinion went on much easier (and will probably hold up better in the long run).
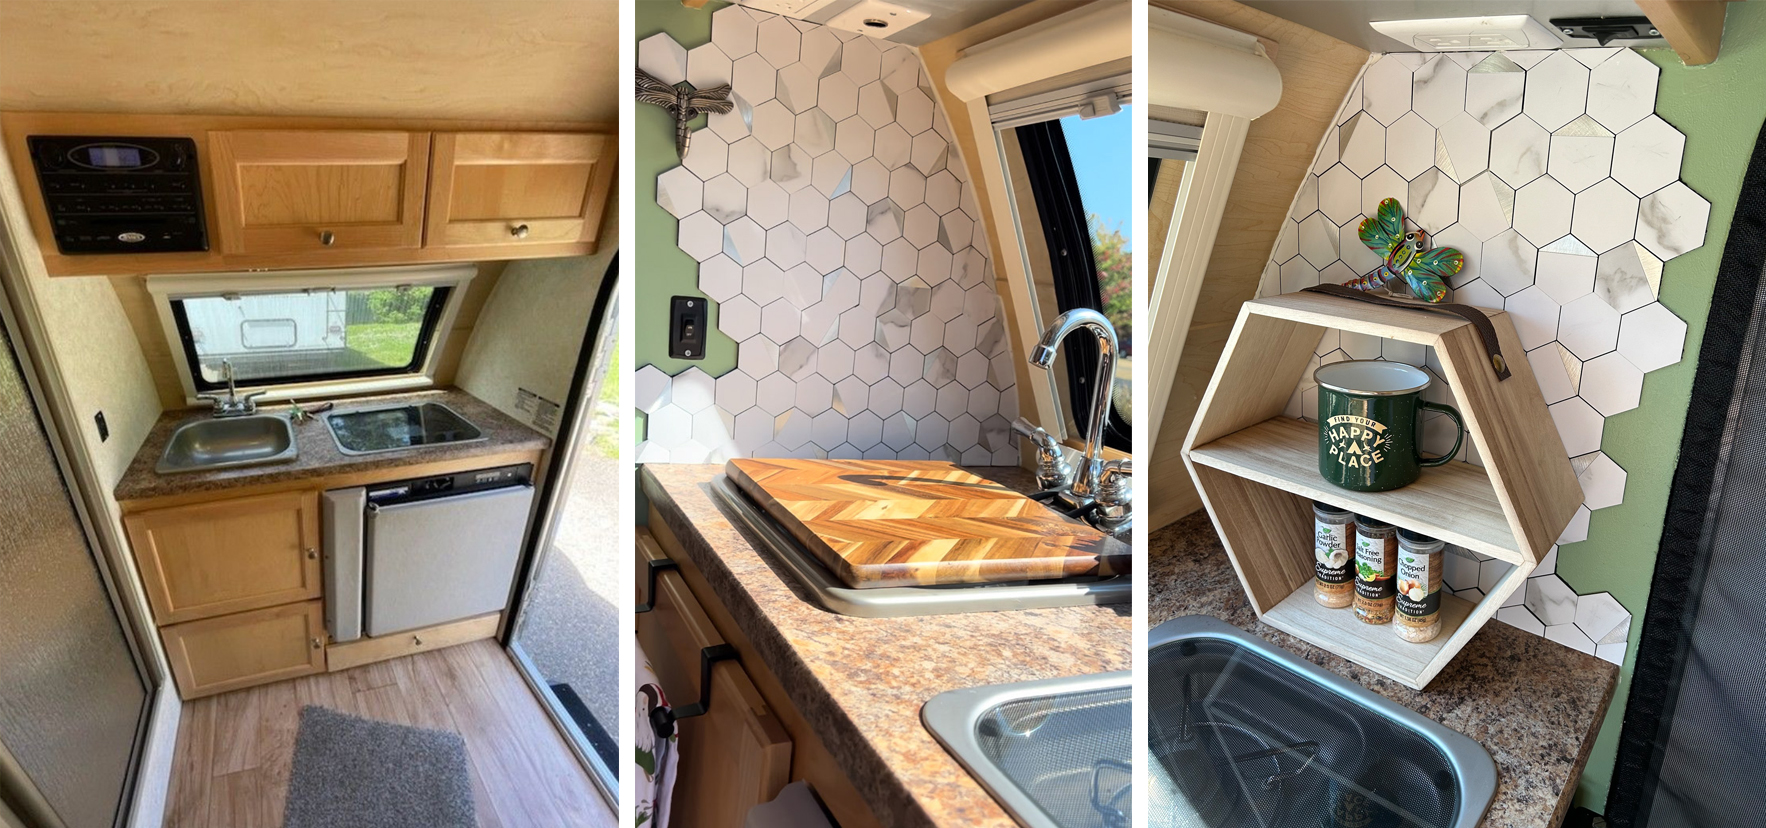
I had seen a lot of people add peel-and-stick tiles to the kitchen wall areas on these trailers, so I chose a faux marble with brushed metal accents. I little touch of modern, but marble (even when it’s faux), still adds a little old school charm and “natural” element. I really like the hexagonal shape too, and instead of just cutting them all in a straight line, I decided to work with the shape a little bit and make each side a little unique.
Here’s a before and after of that area:
Over those couple months I also added many other small upgrades like custom door knobs and little storage options.
Last Saturday afternoon I spent a few hours fussing around with the fabric elements. I really needed to cover the top of the dining seats, so I used a woodland animal print and rather than trying to create a full cover, sewed them like fitted sheets. I used the same fabric on the panels above the windows. For curtains, I choose a bright yellow that played off the yellow color in the woodland animal fabric (and since I already had a lot of pattern going on, did not want the curtains to compete with anything else). Lastly, I made a couple pillow covers in another yellow, floral print fabric I already had.
“A room should never allow the eye to settle in one place. It should smile at you and create fantasy.” –Juan Montoya
I also gathered up some art (including a little piece that Mario drew that always made me laugh that is setting on the back shelf by the bed and some great thrift store finds) to add to the walls and personalize it even more.
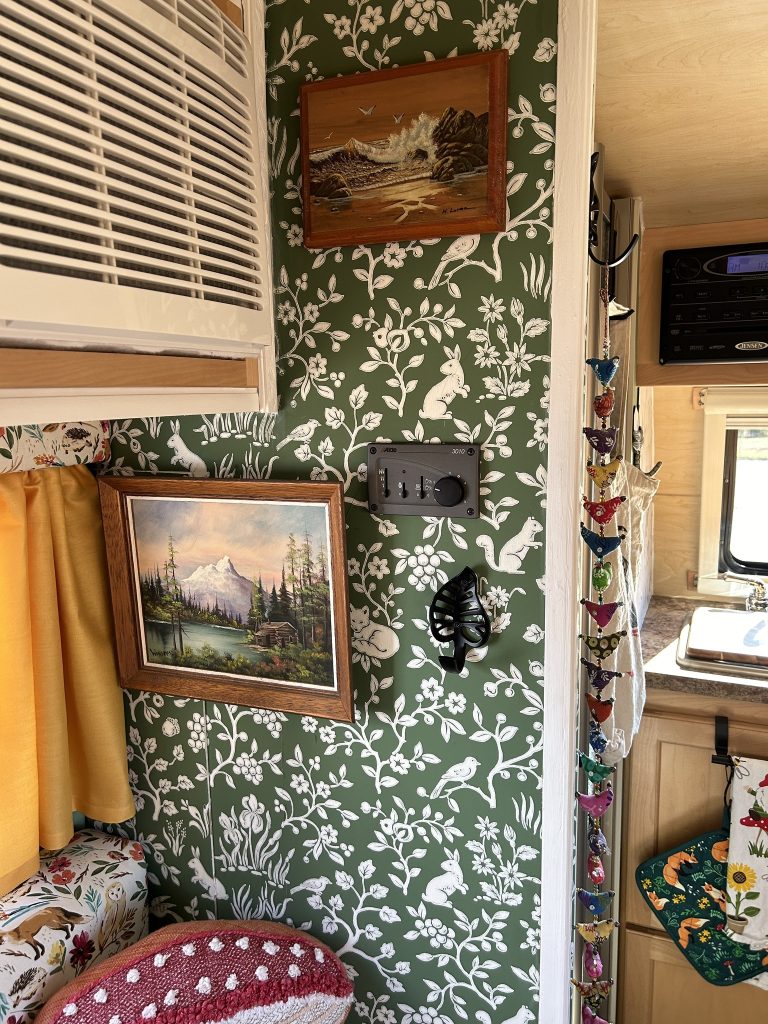
Adding other little bits of decor really made it more home-like: a lantern, a stature of a hare, a wood carved owl, a colorful dragonfly window chime, and of course a couple gnomes. I have one last piece I’m adding and that is a vintage photo I dug out of an album my mom had of the very first trailer I knew when I was a kid. I have such amazing and fond memories of vacations in trailers my parents owned while I was growing up. Now I get to continue that tradition on my own, in my own little trailer. And in addition to taking it out on camping adventures, I also plan to use it as a part time office when I feel like I need to really focus or “get away”.
“Have nothing in your home that you don’t know to be useful or believe to be beautiful.” —William Morris.
Here’s a full list of all the mods I’ve done since I bought the trailer:
- Added a shelf under the non-storage seat to fit a little tool box (and it’s anchored in with hooks and a bungee cord)
- Added a small shelf in the shelf in the back (in my model, that did not open – but it does now!)
- Added a leaf pattern molding right above the shelf in the back
- Painted (right over the original wallpaper with Behr Marquee one coat)
- Wallpapered the area at the back, the wall for the shower and above the window where the A/C unit is
- Added leaf pattern molding on the corner of the wall for the bathroom, the bottom of the shower wall and the corner to the right of the A/C enclosure
- Added storage hooks on the wood ends of the window headers
- Added small round L.E.D. lights under the cabinets in the back
- Added new decorative knobs on all cabinets
- Added other decorative storage hooks (2 leaves, 1 dragonfly)
- Ripped out the thin, original flooring and installed thicker vinyl planks
- Added a new lagoon table
- Added velcro adhesive storage nets on door and above the window where the tv is
- Added a color changing L.E.D. light under the cabinet in the kitchen
- Added hexagonal tile in the kitchen
- Added magnets to the bottom of the screen door and the bottom frame of the door so it stays closed on the bottom
- Added extra storage in the bathroom
- Added a small shower rod in the bathroom to hang clothes
- Added a swing arm clothes hanger/hook on the side of the A/C until so I can hang clothes if I’m using the shower
- Added hooks that go over the shower door
- Added a wire drawer/shelf under the sink
- Found a nice cutting board that fit over the sink
- Added some art on the walls
- Put new fabric on the window headers
- Sewed up curtains
- Sewed up seat covers for the backs of the bench seats
- Sewed a curtain for the porthole window
- Got custom “The Gnome Home” stickers made and put those on
- Got some tire covers for when it’s sitting in my driveway
- Got a gauge for the propane tank to tell me how much is in the tank
I’m more than pleased with the end result (and got hundreds of rave reviews when I posted all the photos on a T@B trailer group!). I feel like I really put my own stamp on it. But it also gave me something to do that was very therapeutic and healing as I dealt with the old grief of losing Mario and the new grief of losing my dad. I know both of them would be smiling over what I was able to accomplish.